It's dark...but it's (sorta') finished! Only one background has been transferred over to the new plywood, but all of those transfers will probably take days! (ugh)...
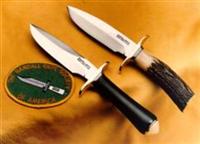
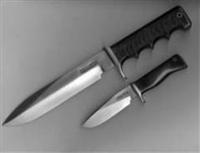
So: The photo of the completed booth shows all 5 lights burning. The knife (Model #11-4 1/2" with dyed box elder) was photographed with the overhead light off. A lot of experimenting will be taking place over the next week or so, but you can see the setup. I have shot all of these "candids", off-hand with one of my other cameras: Canon EOS 60D.
The knife photo was shot with the camera, lens, tripod and set-up listed below:
Camera: Canon 5D MK. II (full format digital SLR)
Lens: Canon "L" series-(F-4) 24-70mm, set at 37mm for this shot
Tripod: Manfrotto Model 190XPROB
Grip: Manfrotto 322RC2, with swivel head
Setting: White balance: Daylight
F-stop: 5.6 (It is, after all nightfall!
ASA/ISO-400
LIGHTS: Overhead (not used in this shot) Cree 5000K
Side-lights: Philips 5200K
Both type of light bulbs, as listed before are:
* Flood type
* LED
* 65W-100W, depending upon Mfg.
Hope this was helpful to some of you. I plan on doing another "redneck tutorial" with "LESS"...a "LOT" less, with the sole intent in showing everyone how to take "1" photo of a knife, and successfully post it to the forum. For now....
Stay sharp, Capt. Chris
Attachments
------

------


 Previous Topic
 Index
Index